Manuals
Editing activity settings
Step 1
Select the activity in the tree and click the yellow Edit button.
Step 2
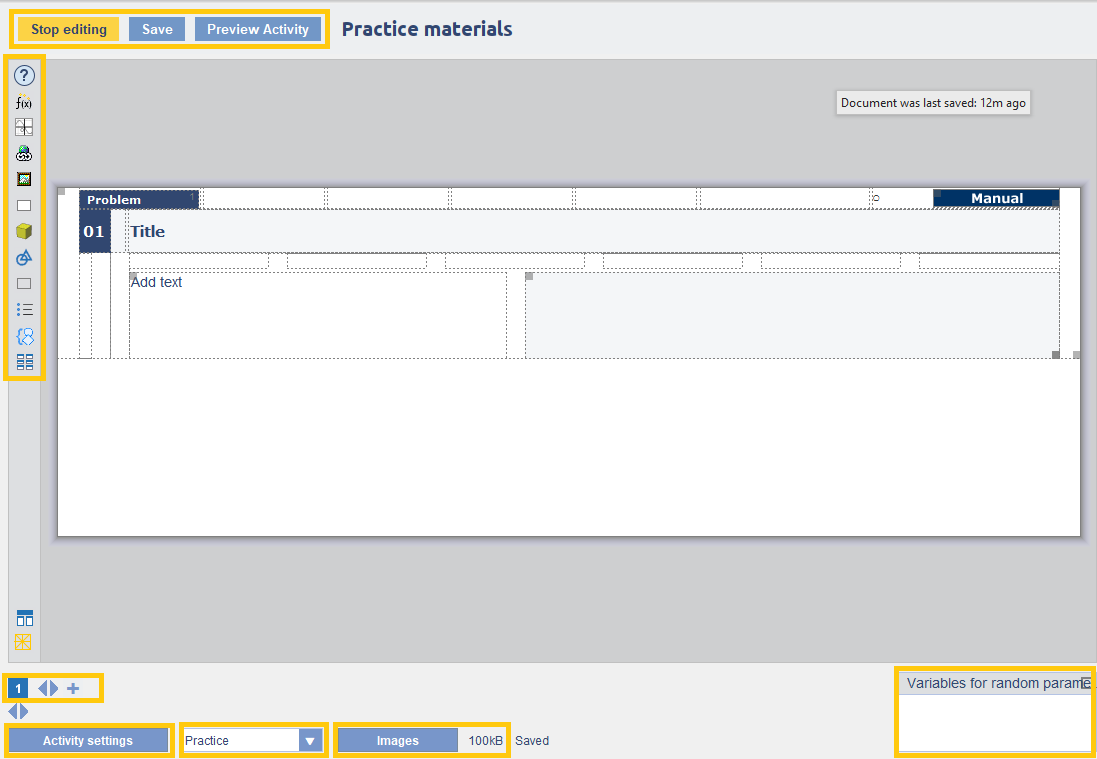
The next screen will become available. The template used gives a document with a two-column layout. In the place of Add text you can now type your own text.
Step 3
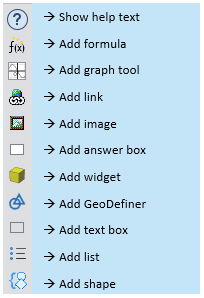
Customize your activity with the following options.
The Toolbar on the left allows components to be added to the activity.
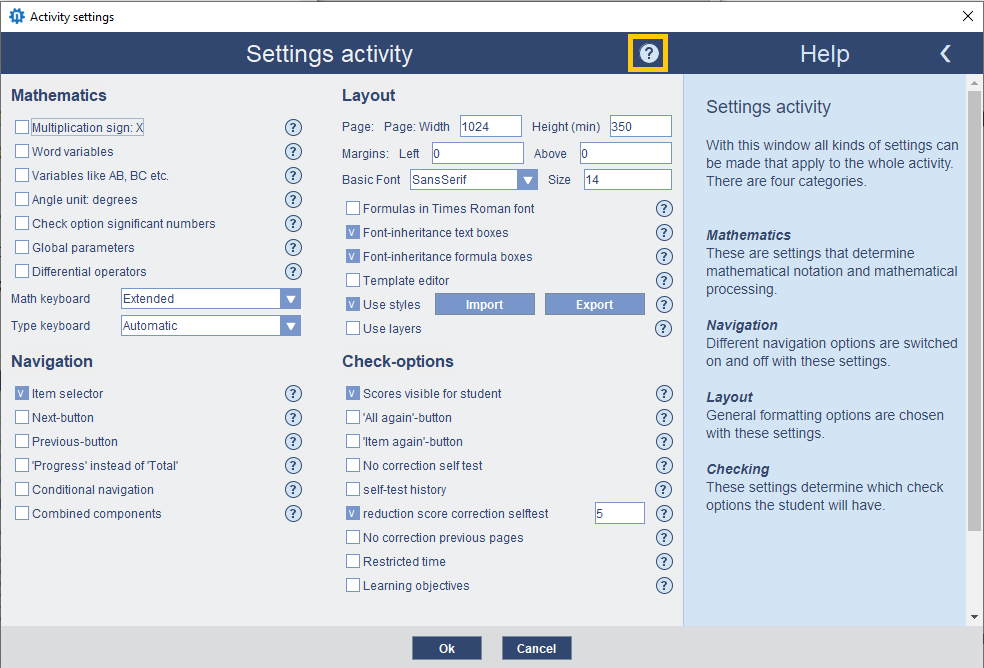
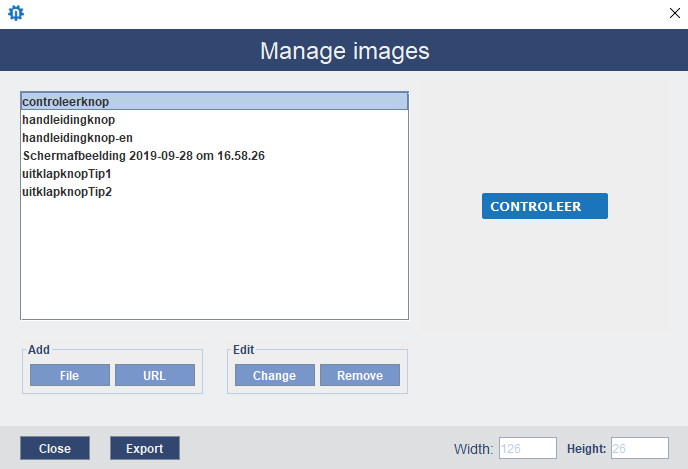
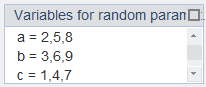
With the Page selector at the bottom of the screen, pages can be created and deleted. By clicking on the number block you go to the relevant page. The Settings activity button gives access to a large collection of settings, which apply to the entire activity. Within this settings panel, additional information can also be requested with the question mark button at the top right. More information is available via the question mark buttons behind the different options. A mode for the activity can be selected through the drop-down menu: The Images button allows the designer to add images to or remove them from the activity. The available images can then be inserted via the toolbar. Images can also be added during insertion via the toolbar. Random parameters can be added at the bottom right. These will differ per student, so that they cannot copy the same answers. Three buttons can be found at the top of the screen: Stop Editing, Save, and Preview. When the activity is finished or if you want to temporarily stop editing, press the left button. Don’t forget to save the activity first by clicking on the middle button. If you want to see what the activity looks like for the student, you can try the activity yourself in preview mode.